
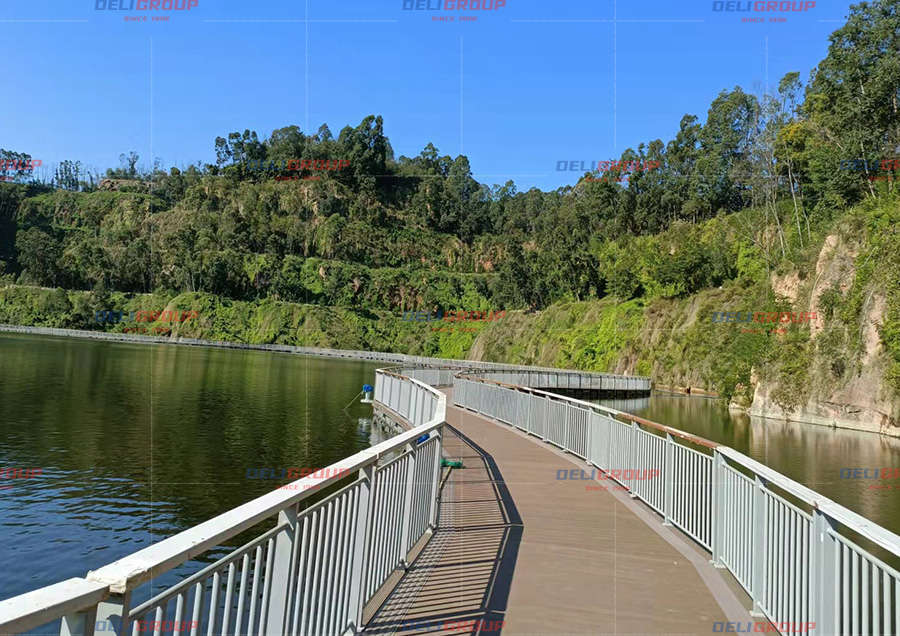
Building a pier is a complex marine construction project that requires careful planning, material selection, and adherence to coastal engineering standards. Whether for a private yacht dock, a fishing terminal, or a commercial ferry pier, the process involves geotechnical analysis, structural design, and corrosion mitigation. Poorly constructed piers fail within 10–15 years due to pile rot, deck spalling, or wave damage. This guide presents nine engineering steps that project managers and marina developers must follow. Each point is based on international codes (PIANC, ASCE) and field experience from projects like those executed by DeFever across Asia and Africa.
1. Site Assessment and Hydrodynamic Analysis
Before building a pier, collect these critical data sets:
Bathymetry – water depth contours, slope, and submerged obstacles.
Wave climate – significant wave height (Hs), period, and direction. For exposed sites, Hs > 1.5m requires special design.
Tidal range and currents – spring tide range, maximum current velocity (m/s).
Ice conditions – if applicable, ice thickness and duration.
Ignoring wave loads is the #1 reason for pier failure. For a site with 1.2 m waves, a pile‑supported pier must resist lateral forces of 5–10 kN per pile. DeFever's project cases show that a thorough site assessment reduces unexpected costs by 30%.
2. Geotechnical Investigation and Pile Design
The foundation determines pier longevity. Conduct soil borings at each pile location (minimum 2 borings per 100 m of pier). Key soil parameters:
N-value (SPT blow count) – indicates density. For timber piles, require N > 15 at tip.
Soil type – sand, clay, or organic silt. Soft clay requires longer friction piles.
Corrosivity – resistivity, pH, chloride content. High chlorides demand coated steel or concrete piles.
Pile types for building a pier:
Timber piles – treated with creosote or CCA. Suitable for freshwater, limited life (20–30 years) in saltwater.
Concrete piles – precast, prestressed. High durability (>50 years) but heavy, requires large driving equipment.
Steel pipe piles – corrosion protected with coatings or cathodic protection. Best for deep water and high wave energy.
Composite (FRP) piles – non‑corrosive but expensive ($200–$300 per foot).
DeFever recommends concrete or steel piles for saltwater commercial piers.
3. Structural Load Calculations and Design Codes
Design the pier to withstand dead loads (self‑weight), live loads (people, vehicles, crane), and environmental loads (waves, wind, current, seismic). Use ASCE 7 or Eurocode 1. Minimum live load for a recreational pier: 5 kPa (100 psf). For commercial piers with forklifts: 15–25 kPa.
Wave impact load – calculate using Goda’s formula or Morison equation for slender piles.
Berthing load – vessel impact energy: E = 0.5 × M × Vb² × Cc. For a 30‑t vessel at 0.5 m/s, E ≈ 20 kN·m. Use fender systems to absorb.
Mooring load – wind and current on vessel hull. Typical line pull: 50–200 kN per bollard.
Many building a pier projects underestimate berthing energy, leading to cracked piles and failed fender panels.
4. Material Selection for Deck, Beams, and Hardware
Decking and structural members must resist rot, UV, and marine borers. Common materials:
Pressure‑treated timber (Southern yellow pine, Douglas fir) – lowest initial cost, but requires annual sealing and replacement every 15 years. Avoid in saltwater due to shipworms.
Tropical hardwoods (Ipê, Cumaru, Garapa) – naturally durable (25+ years), very hard, but expensive ($6–$15 per board foot).
Concrete deck panels – long life, fireproof, but heavy and may crack from freeze‑thaw.
Aluminum grating or planks – lightweight, corrosion‑resistant (6061 or 5086 alloy), slip‑resistant surface. Life 30+ years with anodic protection.
Composite lumber (HDPE with fiberglass) – no rot, but may sag under heavy loads; UV stabilizers required.
For saltwater piers, aluminum or concrete are the most cost‑effective over 50 years. DeFever uses marine‑grade aluminum for decking and handrails in its projects.
5. Corrosion Protection Systems
Saltwater is aggressive. Three lines of defense when building a pier:
Coating – epoxy or polyurethane for steel piles; penetrating sealer for concrete.
Cathodic protection (CP) – sacrificial anodes (zinc or aluminum) for steel and aluminum. Design CP for a 20‑year life.
Concrete cover – minimum 50 mm cover over rebar, with silica fume or corrosion inhibitors.
In tropical waters, without CP, steel piles lose 0.3–0.5 mm of thickness per year. A 10 mm wall thickness would perforate in 20–33 years. Check CP potentials annually (-800 mV to -1100 mV vs. Ag/AgCl).
6. Construction Methods: Pile Driving vs. Drilling
Installation method depends on soil and access. For building a pier over water, typical methods:
Impact hammer driving – for dense sand or stiff clay. Use a diesel or hydraulic hammer. Monitor blow count and set.
Vibratory driving – faster, less noise, but not suitable for hard layers or rock.
Drilled and grouted piles – for rock or very dense layers. Drill a socket, insert pile, and grout. Higher cost but precise.
For pile‑supported piers, drive piles to a refusal criteria (e.g., 10 blows per 25 mm for the last 100 mm). Perform dynamic load testing (PDA) on 5% of piles to verify capacity.
7. Deck and Accessory Installation
After piles are cut to grade, install cap beams, stringers, and decking. Key details:
Brackets and connections – use hot‑dip galvanized or stainless steel (316) bolts and clips. Avoid dissimilar metal contact (e.g., aluminum deck on steel piles without isolator pad).
Expansion joints – every 30–40 m to accommodate thermal movement.
Fender systems – rubber or foam‑filled fenders at each berth. Mount on pile‑mounted brackets.
Bollards and cleats – cast stainless steel or galvanized. Minimum capacity 50 kN for recreational piers.
Case studies from DeFever's portfolio show that poor connection detailing causes 40% of pier failures.
8. Safety Features and Accessibility
Regulations (ADA, local codes) require certain features when building a pier for public use:
Handrails – minimum 42 in (1.07 m) height, with intermediate rail. Stainless steel or aluminum.
Slip resistance – deck surface must have a coefficient of friction ≥ 0.6 when wet. Use textured paint or grating.
Lighting – low‑glare LED fixtures at 20–30 lux average. Photocell and timer controls.
Life rings and throw lines – one per 30 m of pier length.
Fire extinguishers – near electrical panels and fuel docks.
Neglecting safety features can lead to liability claims and fines.
9. Permitting, Environmental Mitigation, and Construction Management
Building a pier requires multiple permits:
Coastal zone management (CZM) consistency
USACE Section 10/404 permit (for navigable waters)
State or local waterfront construction permit
Environmental assessment – avoid or mitigate impacts to seagrass, mangroves, or coral.
Typical permit lead time: 6–18 months. Budget $5,000–$50,000 for studies and fees. DeFever offers turnkey permit management based on experience with 20+ international marina projects.
Case Study: Building a 200‑Meter Concrete Pier for a Fishing Terminal in Africa
A fishing cooperative in Kenya needed a heavy‑duty pier for 50 fishing vessels (up to 20 tons). Water depth 8 m, high wave exposure (Hs 1.8 m). DeFever designed a pile‑supported concrete pier with 500 mm square prestressed piles, cast‑in‑place deck, and rubber fenders. The building a pier process took 14 months, including 5 months for permits. The final cost was $1.2 million, or $6,000 per linear meter. The pier has withstood two tropical storms and remains in excellent condition after 7 years.
Frequently Asked Questions (FAQ)
Q1: What is the typical cost per linear foot for building a
pier?
A1: For a basic residential pier (wood deck on timber piles, 6
ft wide): $200–$400 per foot. For a commercial concrete or steel pier (12 ft
wide, heavy loads): $600–$1,200 per foot. These are material and installation
costs only. Permits and engineering add 15–25%. For a precise estimate, consult
a marine contractor.
Q2: How long does it take to build a pier?
A2: For a
100‑ft residential pier with simple permits: 4–8 weeks (including 2–3 weeks for
pile driving). For a 500‑ft commercial pier with environmental studies: 12–24
months. The longest phase is often permitting (6–18 months). Construction itself
for a 200‑ft pier typically takes 3–6 months depending on weather and tide
windows.
Q3: Do I need an engineer to design my pier?
A3: Yes for
any pier longer than 50 ft, deeper than 6 ft water, or in a wave‑exposed
location. Even for small piers, a structural engineer ensures proper pile
spacing, load capacity, and connection details. Many towns require stamped
drawings for a building permit. DeFever's engineering
team provides sealed designs for international projects.
Q4: What is the best material for a pier in
saltwater?
A4: For piles: prestressed concrete (50+ years) or steel
with cathodic protection (30+ years). For deck: aluminum grating or concrete.
Avoid timber in saltwater unless it's tropical hardwood (Ipê) with annual
oiling. Composite decking is acceptable but check for UV stability. Many building a pier projects now use aluminum for low maintenance.
Q5: How do I maintain a pier to extend its life?
A5:
Annual inspection checklist: (1) Check for loose bolts or corroded hardware –
replace with 316 stainless. (2) Measure pile coating thickness or CP potential.
(3) Look for deck rot or cracks. (4) Clear marine growth from fenders and piles.
(5) Reapply sealer on wood decks every 2 years. For concrete piers, seal cracks
with epoxy and recoat every 5–7 years. A well‑maintained pier can last 50
years.
Request a Feasibility Study or Budget Estimate
Building a pier is a major investment. DeFever offers a free initial consultation – send us your site location, desired pier dimensions, and intended use (private, commercial, fishing). We will provide a preliminary design, material recommendations, and a budget range within 10 business days. Our team handles everything from geotechnical surveys to construction supervision.
Submit an inquiry to our marine engineering team → Click here for a response within 24 hours


