
Fixed docks deflect, timber piles rot, but the most frequent hidden failure in aging waterfront infrastructure is **buoyancy degradation** of floatation units. When foam cores become waterlogged or polyethylene shells crack, the entire dock structure settles unevenly, creating safety hazards, mooring misalignment, and accelerated deck fatigue. For contractors, property managers, and marina operators, understanding the systematic process of replacing floats under dock is not a routine repair—it is a structural intervention requiring precise engineering, material science, and load management.
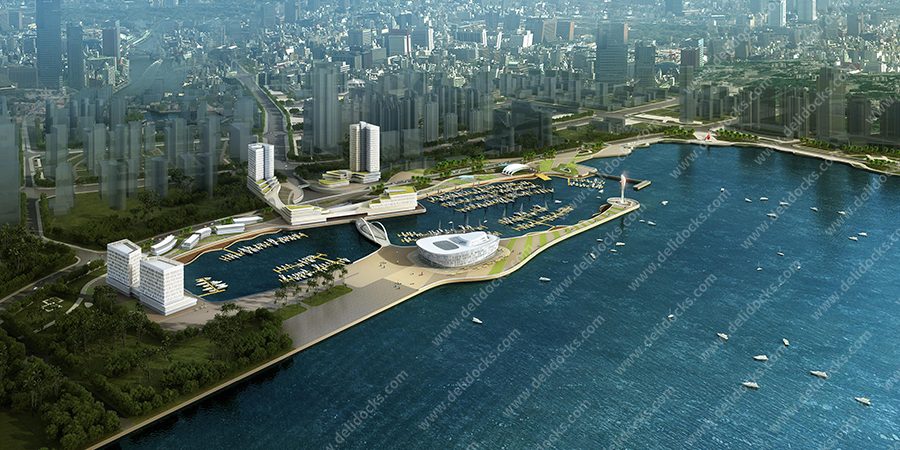
This guide outlines a professional, site-validated methodology for float replacement. Drawing from field projects across tidal zones and freshwater reservoirs, we examine failure indicators, flotation sizing calculations, and the step‑by‑step replacement sequence. All technical references follow ASCE 24‑14 flood design standards. For organizations seeking turnkey support, DeFever has executed over 180 float retrofit projects, including complex replacing floats under dock in restricted-access channels.
Before any physical work, a structured inspection verifies whether partial repair or full float replacement is necessary. Use this checklist to quantify float degradation:
Waterline offset: Measure freeboard at four corners. Variance > 2 inches indicates asymmetrical flotation loss. Use a digital level and reference points on permanent piles.
Localized ponding: Standing water on deck after rain or wave splash points to collapsed foam or ruptured float chambers.
Material audit: For expanded polystyrene (EPS) floats, cut a core sample. If water absorption exceeds 15% by weight (ASTM C272), the entire flotation matrix must be replaced. For rotomolded polyethylene, scan for hairline cracks using a dry dye penetrant.
Boat lift performance: A lift that struggles to raise a load that previously worked indicates insufficient buoyancy reserve — a direct sign for replacing floats under dock.
In marine environments (ISO corrosivity category C5-M), saltwater intrusion accelerates float failure. Document all findings with photos and moisture meter readings (pinning method for EPS). If more than 30% of the float units show compromised buoyancy, plan a full array replacement rather than patching.
Each float technology exhibits distinct life cycle and repair behavior. The choice influences future replacing floats under dock frequency, so select based on water chemistry and wave exposure.
Pros: Highest buoyancy per cubic foot (~60 lb/ft³ net flotation); cost-effective for large dock fields.
Cons: Absorbs water when shell is breached; rodents and marine borers can attack if coating fails.
Replacement note: Requires full encapsulation removal. Old EPS is not recyclable in many regions, so plan for landfill disposal per local regulations.
Pros: Impact-resistant, UV-stabilized, and one-piece seamless construction. Does not absorb water even if punctured (air chambers).
Cons: Lower buoyancy-to-volume ratio because hull thickness reduces interior volume. More expensive upfront.
Replacement advantage: Individual units can be swapped without affecting adjacent floats, making replacing floats under dock faster and cleaner.
Use case: Heavy-duty applications with low wave action (canals, protected marinas).
Failure mode: Rebar corrosion leading to spalling; repair requires dry docking and concrete patching, not comparable to typical float replacement.
For most residential and light commercial applications, rotomolded polyethylene has become the standard. DeFever specifies AA3000-grade polyethylene floats with a 20-year warranty against cracking, minimizing future replacing floats under dock costs.
A common contractor error is replacing floats with identical volume without recalculating current loads (new decking, added utilities, heavier boats). Use this formula to size new flotation units:
Net buoyancy required (lbs) = (Dead Load + Live Load + Snow Load) – (weight of replaced float components)
Step-by-step:
Dead load = framing + decking + railing + utility conduits (estimate at 15 psf for aluminum frame + composite deck).
Live load = 40 psf for residential docks (ASCE 7-22) or 60 psf for commercial transient slips.
Snow load = per local building code (e.g., 30 psf for Lake Tahoe).
Total required buoyancy = total load × safety factor (1.25 for freshwater, 1.4 for saltwater due to lower density).
Then divide net required buoyancy by the net flotation per float (float volume in ft³ × 62.4 lbs for freshwater minus the float's own weight). For example, a 2’x4’x1.5’ polyethylene float has volume 12 ft³, gross buoyancy 749 lbs, minus self-weight 85 lbs = 664 lbs net. For a 600 sq.ft. dock requiring 24,000 lbs net buoyancy, you need 37 such floats. This calculation is mandatory before ordering any new units for replacing floats under dock.
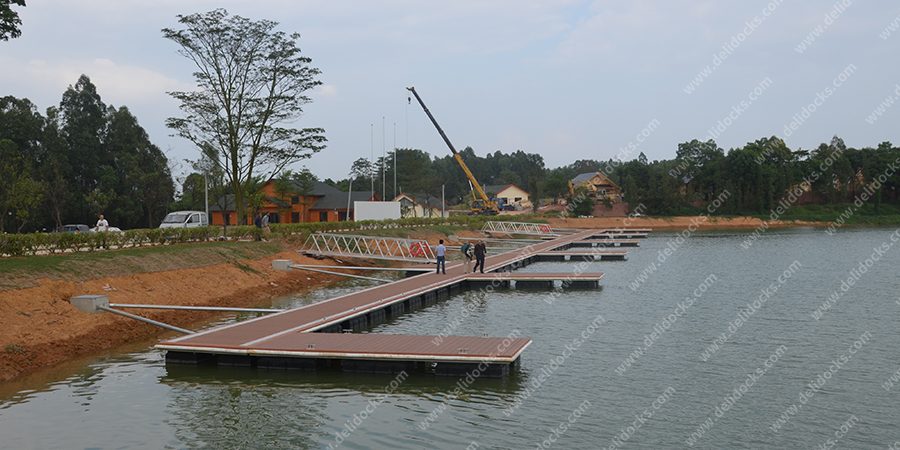
Field replacement demands coordination of tides, lifting equipment, and temporary support. Below is the B2B standard sequence used by professional marine contractors.
Disconnect electrical feeders to the dock at the shore panel (lockout/tagout per NFPA 70E). Verify zero voltage with a non-contact tester.
Cap water supply lines and drain any onboard plumbing. Use freeze‑proof blowout plugs if temperature below 40°F.
Install temporary warning buoys around the work zone to prevent vessel wake.
Before removing any float, lift the dock deck using hydraulic jacks or shore‑based mobile cranes. For low tide access, use inflatable rollers (max 10 psi) placed at 8‑ft intervals to distribute weight. Alternatively, drive temporary spud piles (2” schedule 80 aluminum) through guide sleeves to hold the dock at a fixed elevation, allowing safe float removal.
Unbolt or unstrap each float from the mounting channels. For corroded bolts, apply penetrating oil (Kroil or PB Blaster) and use an impact wrench with socket extension.
Attach lifting straps to each float’s designated lifting eyes (if absent, use a spreader bar under the float to avoid cracking). Remove with a telehandler or 2-ton gantry crane. Never leverage a float against piles; this can bend mount brackets.
Once removed, pressure wash the underside of the deck frame and remove marine growth with a plastic scraper (metal tools damage corrosion coatings). Document any hidden corrosion on stringers.
Position new polyethylene or encapsulated floats in the same pattern but verify alignment marks. Use stainless steel 316L bolts (1/2”-13 thread) with nylock nuts. Apply Tef-Gel to threads to prevent galvanic seizure.
Where replacing floats under dock with a different profile (higher freeboard), install aluminum spacer brackets to keep the deck elevation consistent with adjacent fixed sections.
For each float, install a sacrificial zinc anode (1 lb per float) if used in salt or brackish water. Connect anode to the mounting bolt with a copper bonding wire.
After all floats are secured, slowly lower the temporary jacks. Measure freeboard at four corners; acceptable tolerance ±0.5 inch. Conduct a live load test: walk six people (≈1200 lbs) to one side; deflection should not exceed 1.5 inches and return to original level within 10 seconds. If persistent tilt occurs, adjust float positions or add supplementary flotation under the low side.
DeFever provides on-site supervision for the entire replacement workflow, including crane logistics and tide scheduling for projects requiring out-of-water operations.
Based on post-repair audits, three frequent failures damage new floats or cause recurrent issues:
Insufficient air venting: Sealed polyethylene floats can heat up and over-pressurize if left under sun before submersion. Always install a Schrader valve or small breather hole (covered with hydrophobic mesh) to equalize pressure.
Mismatched bolt metals: Using galvanized bolts with aluminum frames leads to rapid corrosion (potential difference >0.5V). Enforce 316 stainless or aluminum-bronze fasteners.
Neglecting slope angle: A dock that was tilted before replacement may need wedges in float brackets. Pre‑measure slope of the existing stringers; compensate by machining HDPE shims (0.25” increments) between float top and mounting rail.
Also, after replacing floats under dock, recertify electrical continuity of the grounding system. Stray current from new floats with anodes can create galvanic loops. Test with a corrosion reference electrode (Cu/CuSO4) at each utility outlet.
For B2B waterfront portfolios, the total cost of ownership for flotation includes not only the float purchase but also crane rental, disposal fees, and downtime. Rotomolded polyethylene floats typically have a 15‑year service life in tidal zones, versus 8‑10 years for unprotected EPS. Investing in commercial-grade floats with 0.5” wall thickness raises initial cost by 25% but doubles replacement interval, reducing future replacing floats under dock events from three times to once every 25 years.
Many environmental agencies now require low-leaching materials. Polyethylene meets NSF/ANSI 61 for potable water contact, whereas some EPS contains brominated flame retardants restricted in certain states. Always request a material safety data sheet from your supplier.
Q1: How
do I know if only a few floats need replacement or the entire
array?
A1: Perform a buoyancy profile test. Remove
one suspected float; if the dock drops more than 2 inches at that location,
adjacent floats are also overloaded. Also, weigh a removed float. An EPS float
that exceeds its original weight by >20% has absorbed excessive water and
indicates systematic failure. For polyethylene, if more than 25% of units show
cracks or water inside (drain and weigh), replace all floats of the same
production batch. Q2: Can replacing floats under dock be done without
removing the dock from the water?
A2: Yes, using a
technique called “float‑on‑float” replacement. First, attach auxiliary temporary
floats (inflatable marine rollers or spare polyethylene blocks) to the side of
the dock. Then unbolt the target float, slide it out laterally, and insert the
new float. This works only for calm water (wave height <0.3 ft) and requires
a dive team. Otherwise, shallow water removal with a boat lift or marine
travelift is safer. Q3: What is the typical labor time for replacing
floats under dock for a 500 sq. ft. residential
dock?
A3: For a crew of three experienced
technicians: 8 hours for diagnosis and site setup, 12 hours for removal
(assuming no unforeseen corrosion), 8 hours for installing 24‑30 new floats and
sealing, plus 4 hours for electrical reconnection and load test. Total 32 onsite
hours. Tide delays can add 20% more. DeFever typically
completes such projects over two working days with pre‑scheduled high‑tide
windows. Q4: What is the correct disposal method for old EPS foam
floats?
A4: Expanded polystyrene cannot be placed
in standard recycling bins due to low density. Many municipalities require
disposal at a construction & demolition landfill. Alternatively, contract a
foam densifier service that melts EPS into ingots (recycled into picture frames
or insulation). Never burn EPS – it releases styrene vapors. Polyethylene floats
can be ground and remolded into dock bumpers. Q5: How does replacing
floats under dock affect the dock's rating for boat lift
capacity?
A5: If you increase net buoyancy by
upgrading to higher-volume floats, you effectively raise the dock’s reserve
buoyancy, which may allow a larger boat lift. However, the mooring pile system
and deck framing remain limiting factors. Perform a structural analysis of the
pile-to-deck connections before upsizing lift capacity. As a rule, keep float
buoyancy within 120% of original design unless piles are verified.
Every waterfront project presents unique water level fluctuations, substrate conditions, and existing dock geometry. Whether you need a complete float array overhaul or a targeted replacement of damaged units, DeFever provides engineered float layouts, buoyancy calculations stamped by a licensed marine engineer, and turnkey field supervision. We also supply custom‑sized polyethylene floats for non‑standard stringer spacing.
Send your project inquiry including dock dimensions, photos of current flotation, and water salinity type. Our B2B engineering team responds with a detailed scope of work, material lead times, and fixed‑price quotation within three business days.
Contact DeFever’s Float Replacement Division Directly — mention “float retrofit” for priority handling.

